This is one of the first projects I have been working into, and for the record, it’s already finished! The beginning of this little guy comes from both the motivation of being in possession of a (by the way, amazing) LEGO Mindstorms Kit and the need of going beyond what the kit itself offers you. I managed to build some kind of rover with the LEGO Mindstorms Kit with the basics functions it offers but while looking at some extremely-high-level projects as NASA’s Curiosity (after which this rover has been named) the feature of controlling the movement of the rover and receive live images, all by wireless communication, was very tempting.
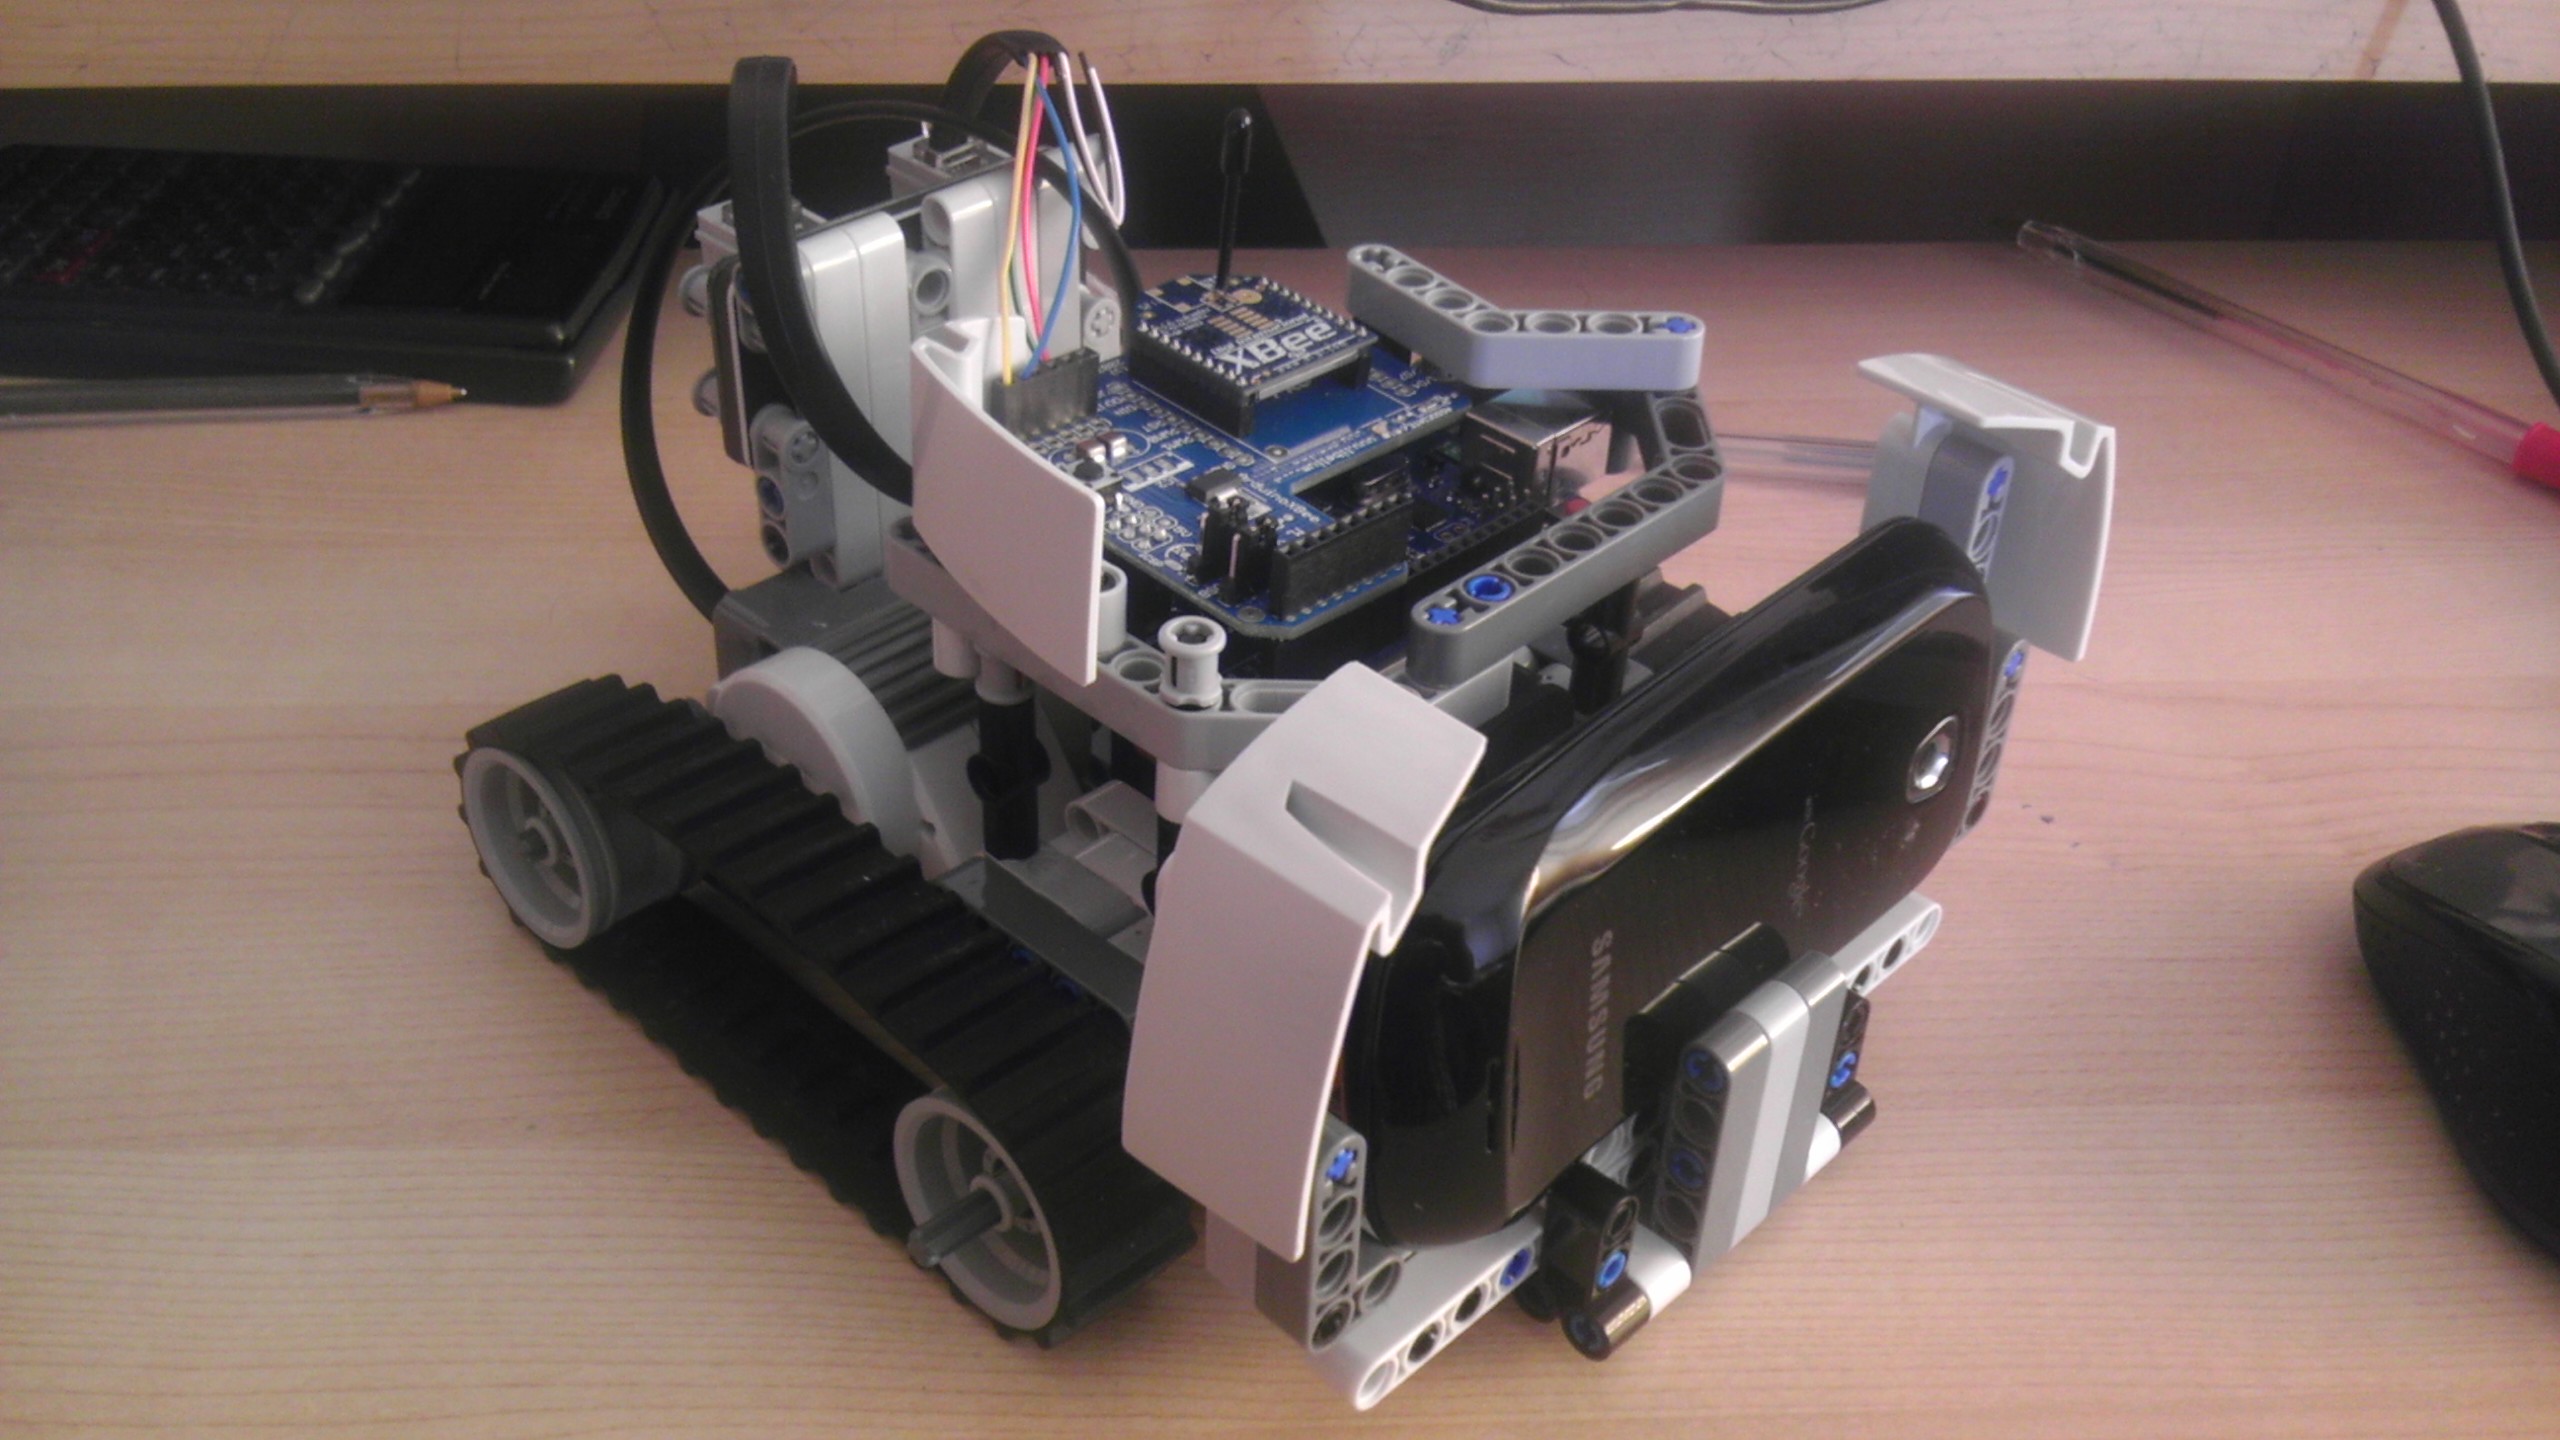
The microcontroller chosen is Arduino Uno. To control the LEGO motors from the Arduino there is this Mindstorms Multiplexer: NXT-MMX, which allows by I2C communication to control up to 2 motors and one additional NXT device. There was also a library available for Arduino to control the NXT-MMX. In wireless terms, the devices used were XBee S2 Modules, with 2mW of signal power, an XBee Shield for Arduino and a USB XBee Shield to connect to the computer. The Arduino was powered by six 1.5V batteries, and as a special feature, it has a white LED working as a flashlight. In order to send live images to the computer, a simple smartphone was used (particularly, the Samsung i5800 Galaxy 3) working as an IP camera. In terms of programming, as some of you may know, Arduino is programmed in C/C++, but for the computer software, JAVA was used as the programming language, not for any special reason but only for knowing how to work with it.
The last feature it had was a light sensor that was measured by the analog inputs on the Arduino and sent as a telemetry to the computer. It has no special application, but it’s an example of some additional telemetry data being sent by the XBee connection.
——–
Les presento al Bercianity
Este es uno de los primeros proyectos en los que he estado trabajando, y por cierto, está terminado! El comienzo de este pequeño viene de la motivación de estar en posesión de un (increíble, por cierto) LEGO Mindstorms Kit y la necesidad de ir más allá de lo que el propio kit te ofrece. Conseguí construir una especie de rover con el LEGO Mindstorms Kit con las funciones básicas que ofrece pero mirando a algún proyecto de un nivel extremadamente alto como el Curiosity de la NASA (por el cual este robot recibe el nombre), la característica de controlar el movimiento del rover y recibir imagen en vivo, todo por comunicación inalámbrica, era bastante tentadora.
El microcontrolador elegido es el Arduino Uno. Para controlar los motores de LEGO desde el Arduino existe este multiplexor de Mindstorms: NXT-MMX, el cual permite por comunicación I2C controlar hasta 2 motores y un dispositivo NXT adicional. Existe además una librería disponible para Arduino para controlar el NXT-MMX. En el plano de comunicación inalámbrica, los dispositivos usados fueron los XBee S2 Modules, con 2mW de potencia de señal, un XBee Shield para Arduino y un USB XBee Shield para conectarlo al ordenador. El Arduino estaba alimentado por 6 pilas de 1.5V, y como función especial, tenía un pequeño LED blanco funcionando como linterna. Para enviar imágenes en vivo al ordenador se usaba un simple smartphone (en concreto el Samsung i5800 Galaxy 3) funcionando como cámara IP. En cuestión de programación, como algunos de vosotros sabréis, Arduino está programado en C/C++, pero para el software del ordenador se ha utilizado JAVA como lenguaje de programación, no por ninguna razón especial, sino por el hecho de que conocía cómo trabajar con él.
La última característica que tenía era un sensor de luz cuyo valor era medido por las entradas analógicas del Arduino y enviadas como telemetría al ordeandor. No tiene una aplicación especial, pero es un ejemplo de envío de telemetría adicional por la conexion XBee.